Z-offset debug
What to check :
Always do your paper test calibration on the nozzle
Tram your bed corners, good mod for this : https://github.com/qidi-community/Plus4-Wiki/tree/main/content/Screws-Tilt-Adjust
If you are running with factory settings and that the probing system works well, you can use this mod to make the Z-offset permanent (but it is not a full 100% proof since lots of factors will change the bed adjustments) : https://github.com/qidi-community/Plus4-Wiki/tree/main/content/making-z-offset-permanent
Take the habit of doing a ” Z_TILT_ADJUST ” everyday
Make sure your filament setups are all adjusted in the slicer before going too far …. follow companies recommendations and adjusts as needed.
Always CALIBRATE every brand and TYPE of filament you use with the utility tools incorporated inside the slicer to tests … save everything.
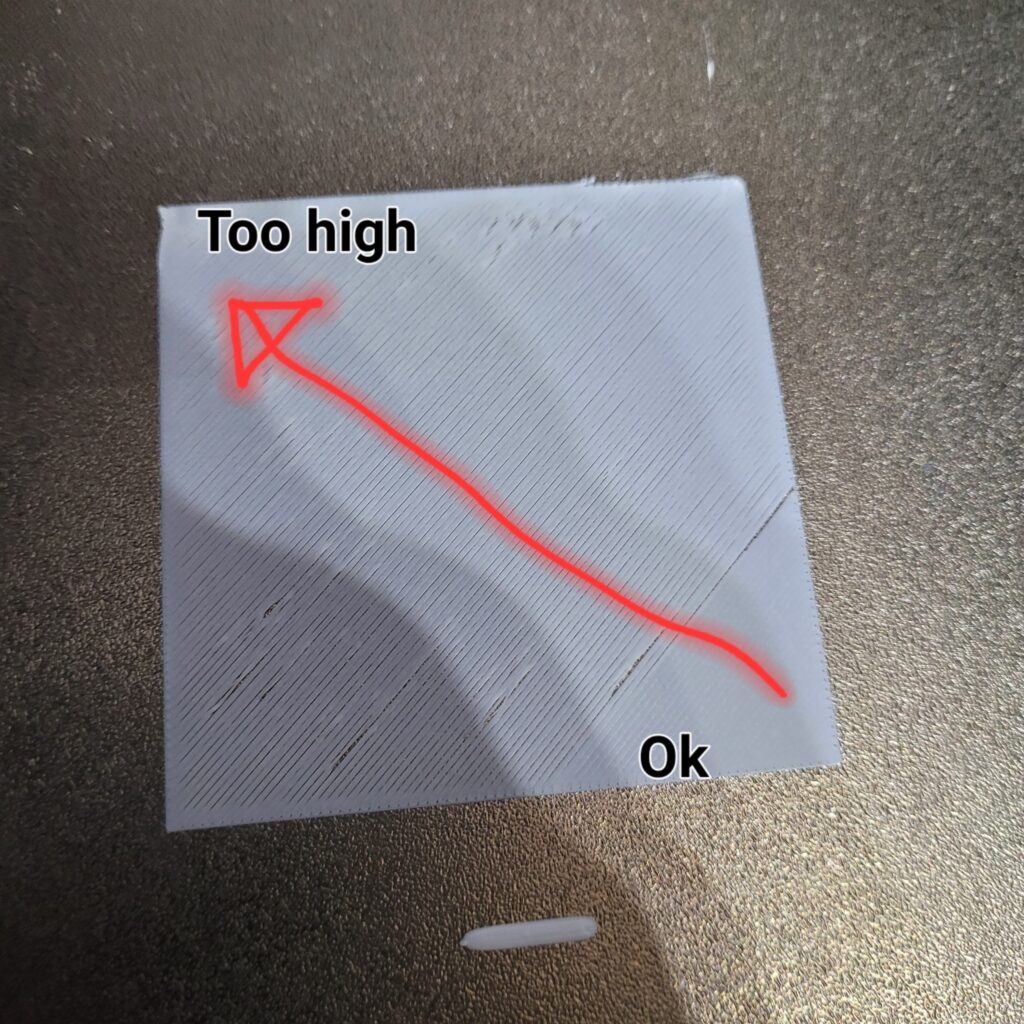
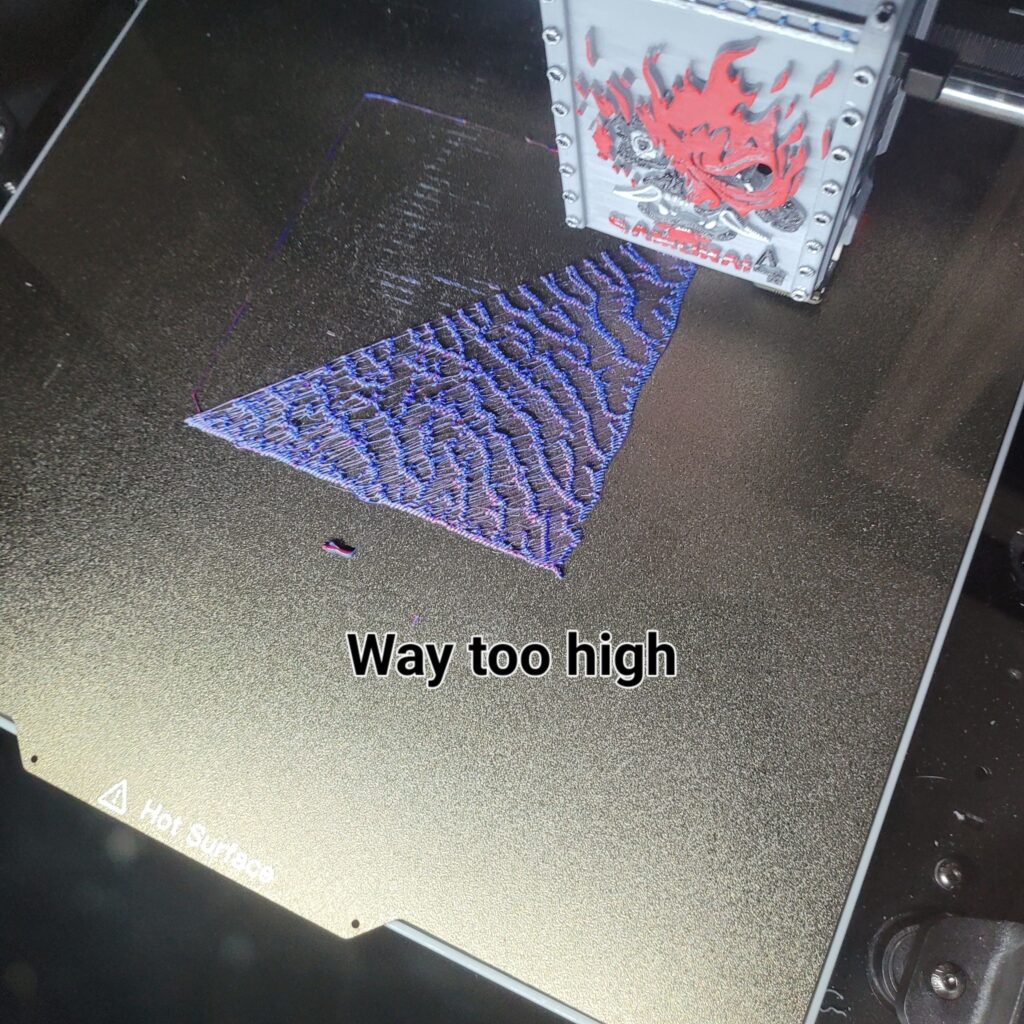
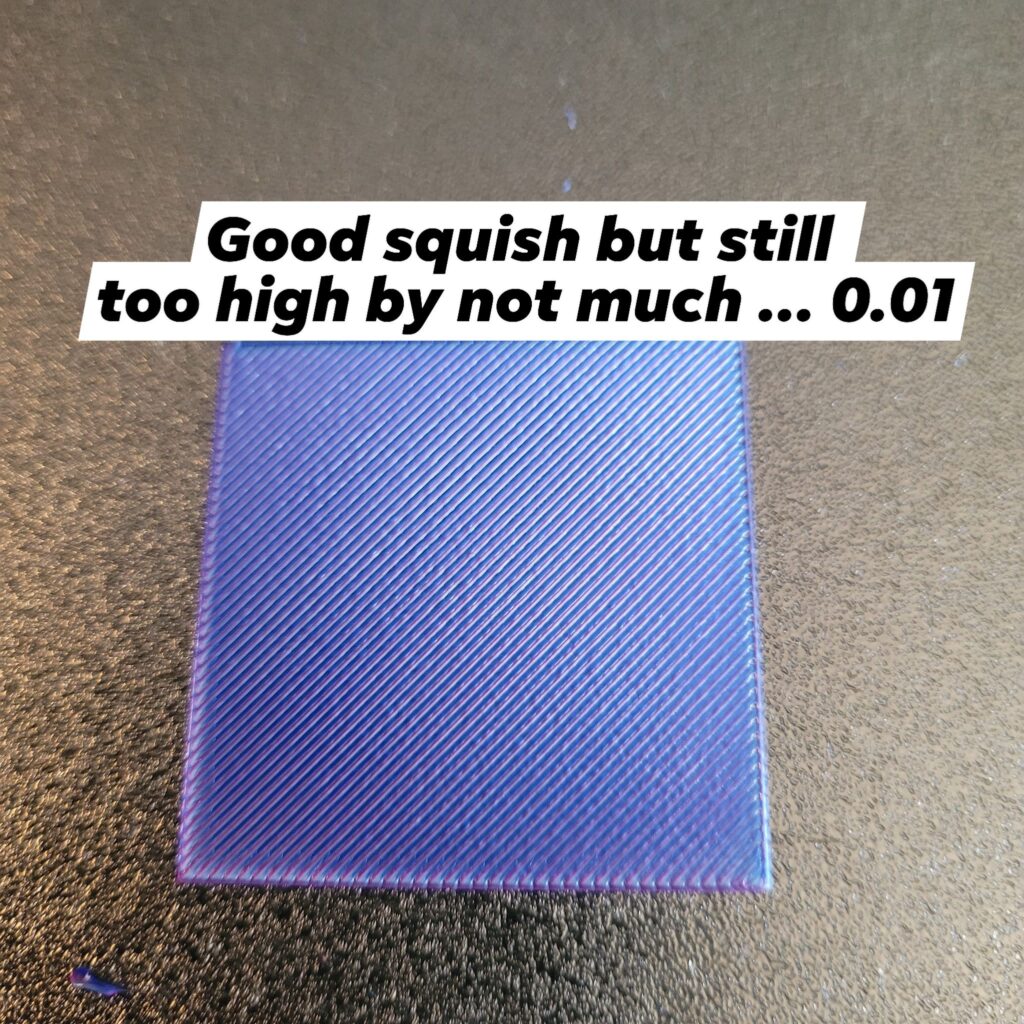
Then, do your Z-Offset test plate … start with a small 40x40x0.2 cube and trim your Z up or down untill ideal results and SAVE&RESTART
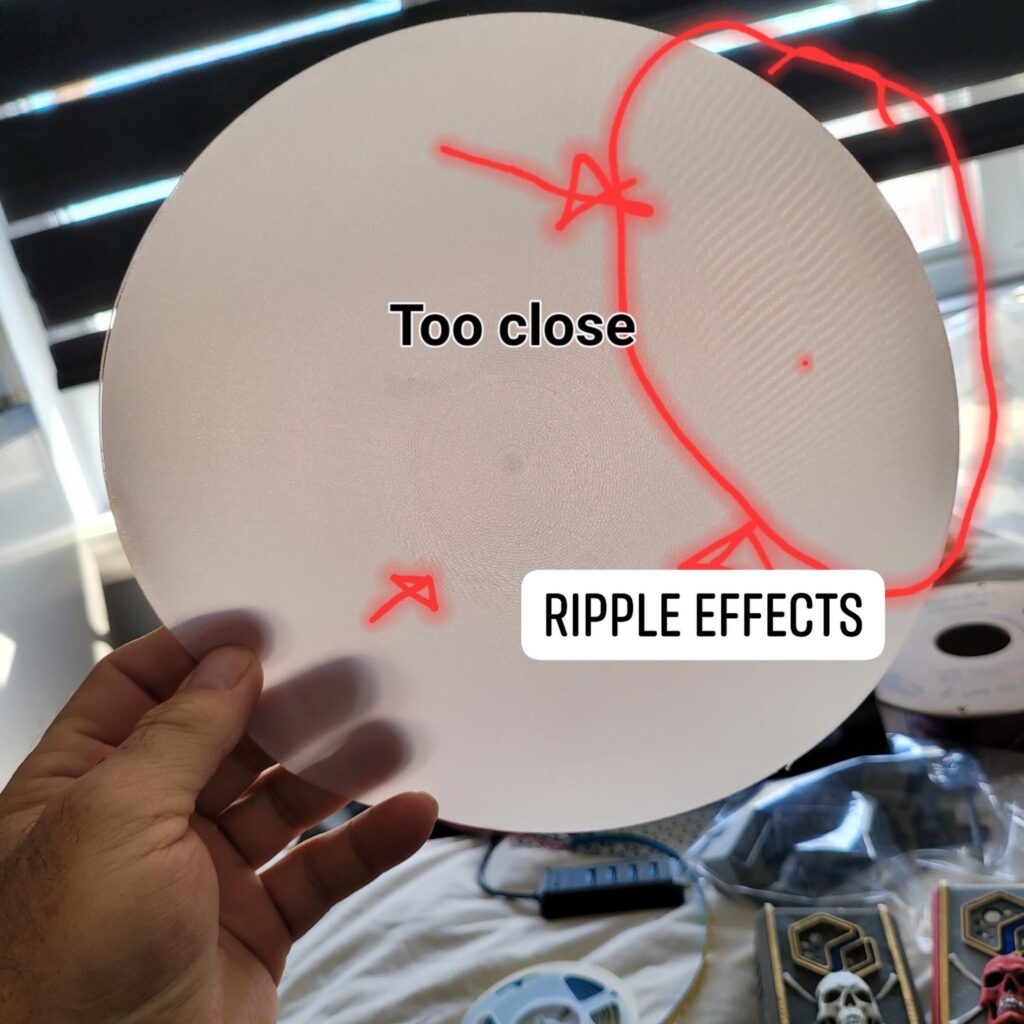
One good way to check is always with a visual but also, by passing your finger on the print, it should feel as smooth and uniform to the touch 
If you have MOD and are using the Beacon or Carto, well you should have enough knowledge and followed the tutos on this … always place for improvments, but up to now, the Beacon probe as provren to be the only way to correct and make sure the first layer comes out perfect.
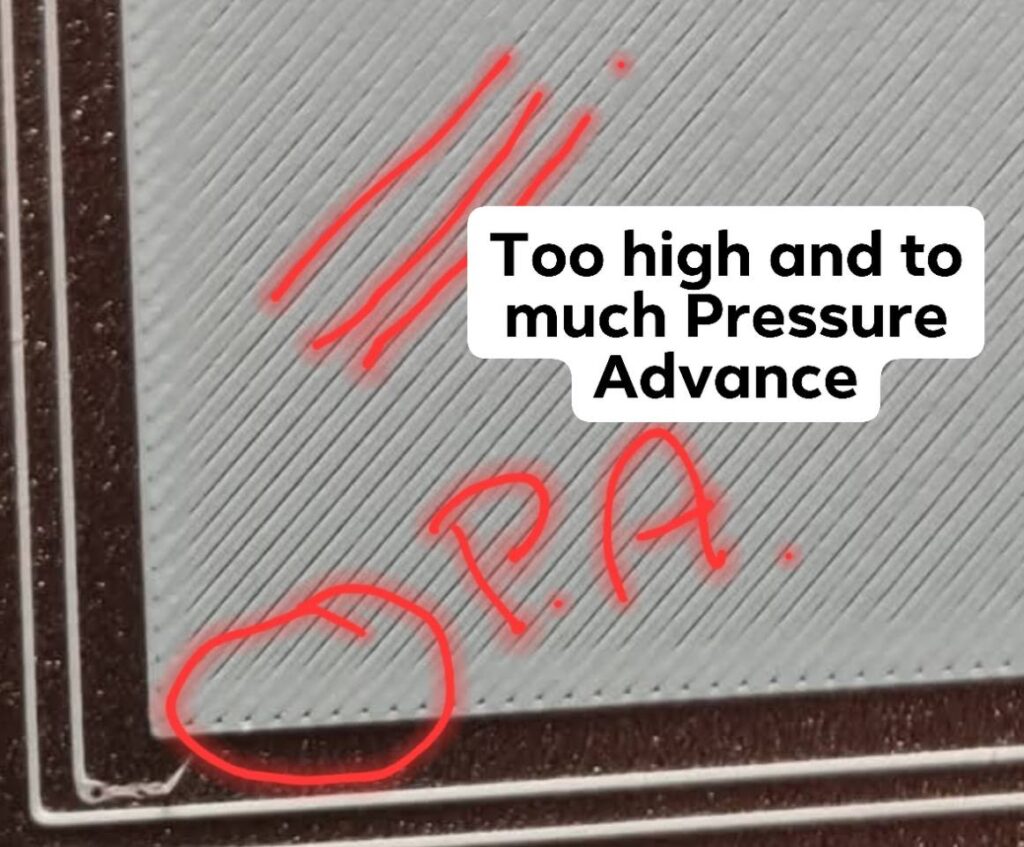
I leave some examples of first layers for you to compare and, always full of good informations online anyway so, Google it, ask in here and have fun or go print to make some $$$