How to Cut a Kurti part 5, Cutting the Pattern
Part 5 Cutting the Pattern
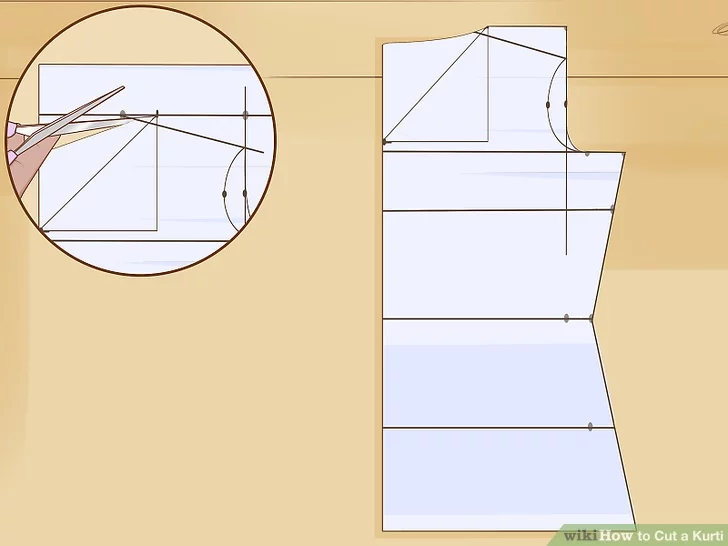
- You are skipping the front neck and arm holes because those are bigger.
- Don’t worry about adding the seam allowance here. You will add those later, when you cut the fabric.
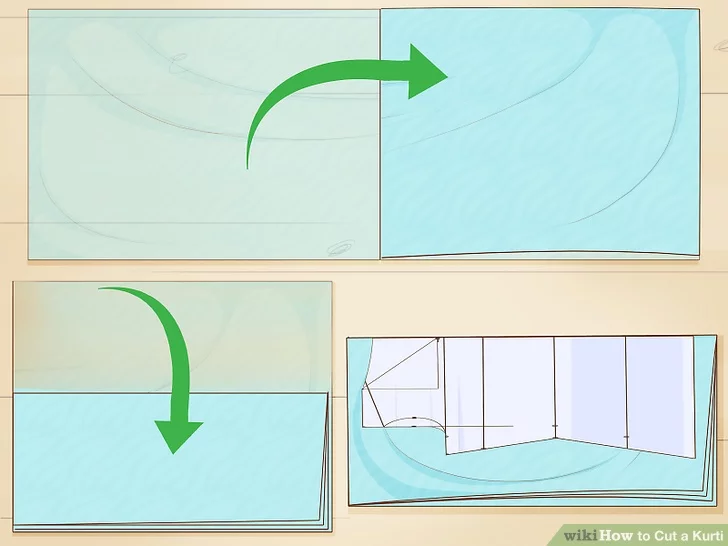
- Purchase fabric that is twice the length of your desired kurti, plus 4 in (10 cm).
- Cotton is a great beginner fabric because it is easy to work with, but you can also use silk or linen.
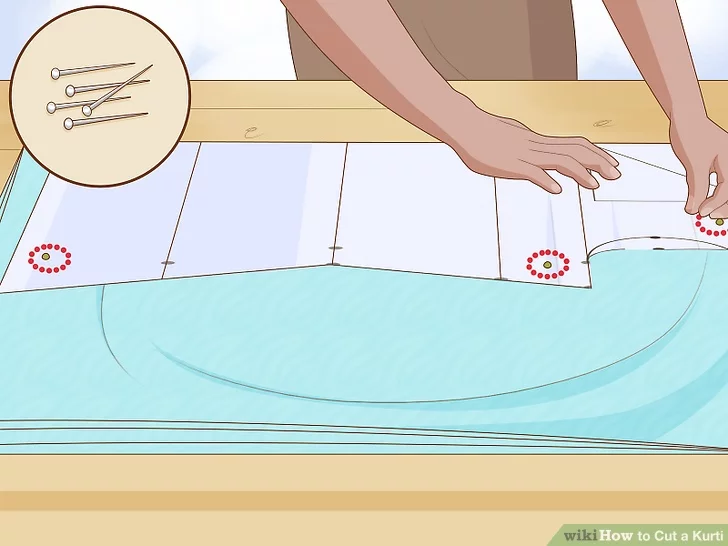
- Make the bottom edge of the pattern about 1 in (2.5 cm) from the bottom edge of the fabric. You need extra space above the shoulders for the seams.
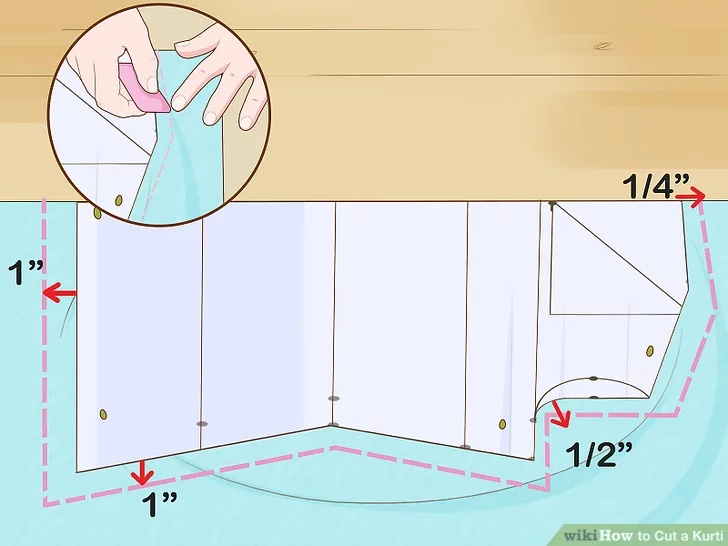
- Bottom hem and sides: 1 in (2.5 cm)
- Arm hole and shoulder: 1⁄2 in (1.3 cm)
- Neck hole: 1⁄4 in (0.64 cm)
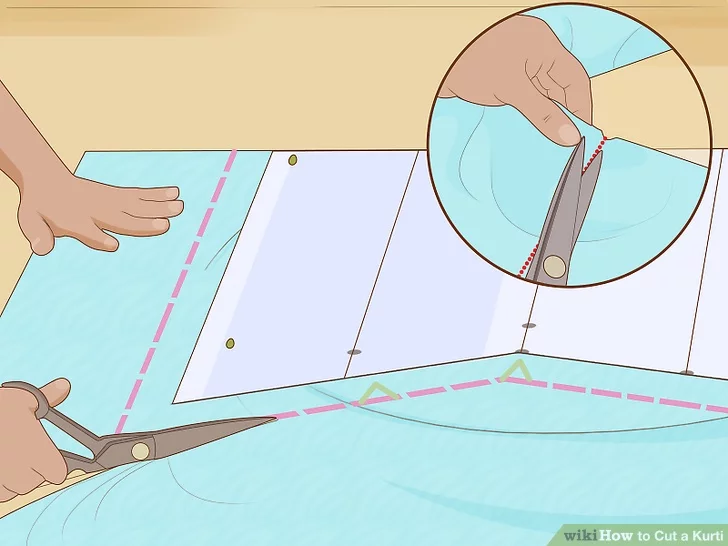
- You are actually cutting through all 4 layers of fabric. Don’t worry about the front neck and arm holes; you’ll take care of those next!
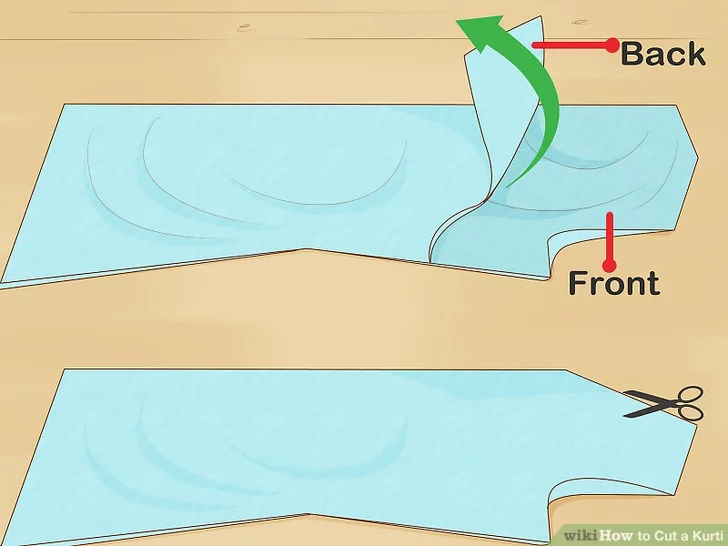
Set aside 2 pieces, then trace and cut the front arm and neck holes. Lift the top 2 fabric pieces off of your stack, and set them aside. Cut the front arm and neck holes from your pattern, then pin it to the remaining fabric pieces. Trace around your pattern, adding seam allowances like before, then cut along them.[41]
- Use the same seam allowances as you did for your back pieces. For example, if you used standard seam allowances, then use them here as well.
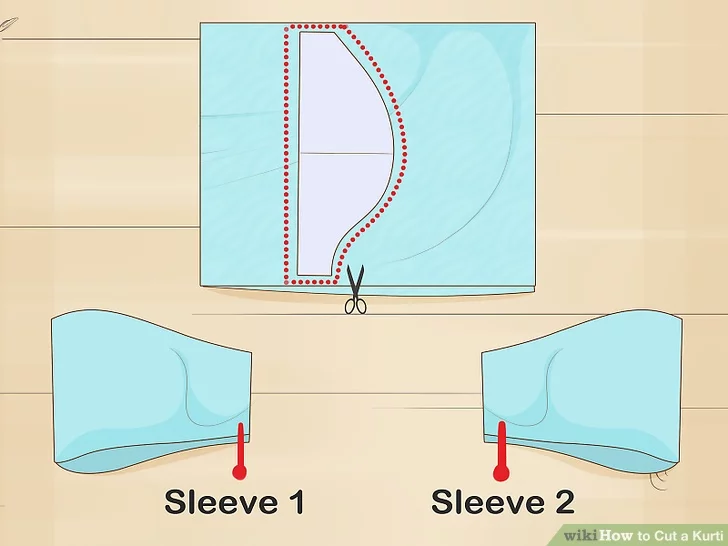
Pin the sleeve to the fabric, trace the seams, then cut it out. Stack 2 layers of scrap fabric with the right sides are facing in. Pin the sleeve pattern on top, making sure that the length is parallel to the grain. Trace the seam allowances, then cut the sleeve pieces out.[42]
- You can use your own seam allowances, or you can use standardized seam allowances.
- For standardized seam allowances: add 1 in (2.5 cm) to the bottom and side edges, and 1⁄2 in (1.3 cm) to the curved edge.
- Fold the sleeves in half so that the sides match up, then cut a little notch into the top, curved edge. This will help you center the sleeve onto the shoulder!
https://www.wikihow.com/Cut-a-Kurti