How to Cut a Kurti part 3, Adding the Arm and Neck Holes
Part 3 Adding the Arm and Neck Holes
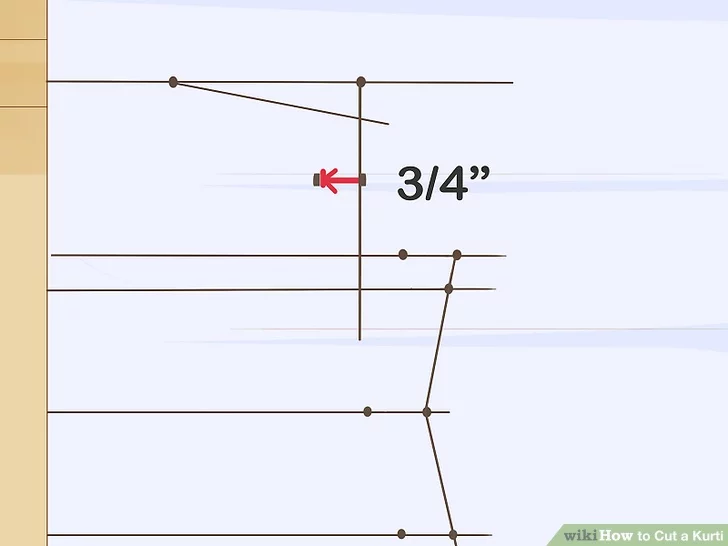
- Think of this as creating a reverse “ease” point.

- This completes the front arm hole.
- You are using the ease point on the shoulder slope, but the original point (not ease point) on the chest line.
- If you don’t have a French curve, you can draw the arm hole freehandedly.
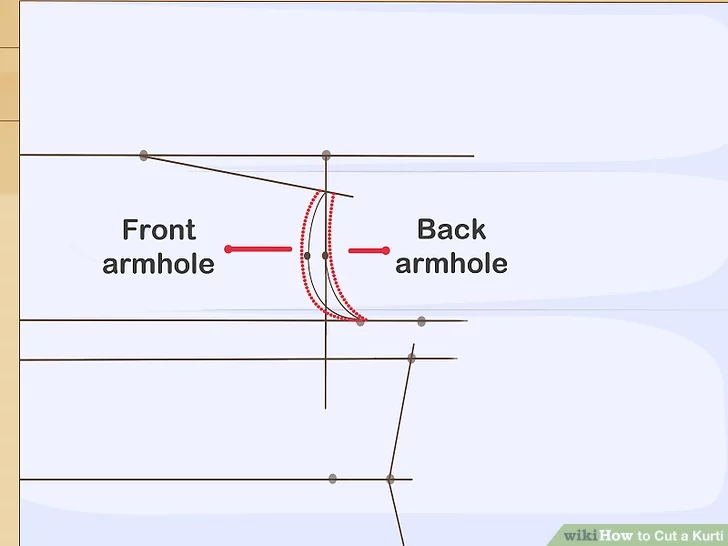
- This will make the back arm hole. Make the line a different color, if possible; alternatively, make it dotted.
- When you cut the kurti, you will cut this part first. Then, you will cut into the pattern and trace the front arm hole.
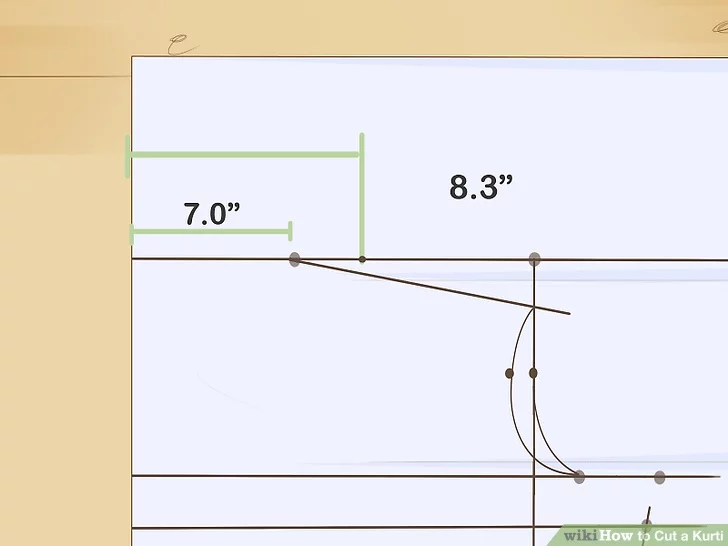
- For example, you can widen your neck hole to 3 1⁄4 in (8.3 cm).
- Remember, your neck hole will be twice as wide after you cut the kurti.
- This is the front neck hole. You will trace the back neck hole later using a different color.
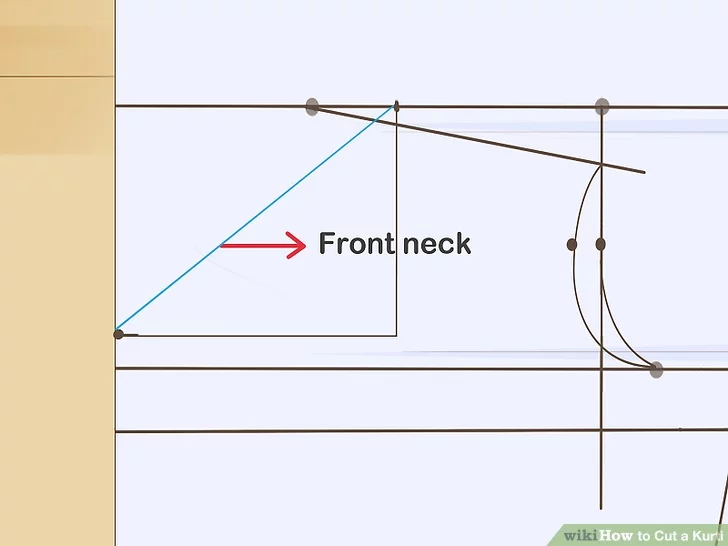
- If you don’t want a curved neckline, you can leave it as a rectangle or turn it onto a V-shape. You could even add a scalloped edge!
- Whichever shape you choose, remember that you are only drawing half of it for right now. For example, if you wanted a V-neck, you’d draw a diagonal line.
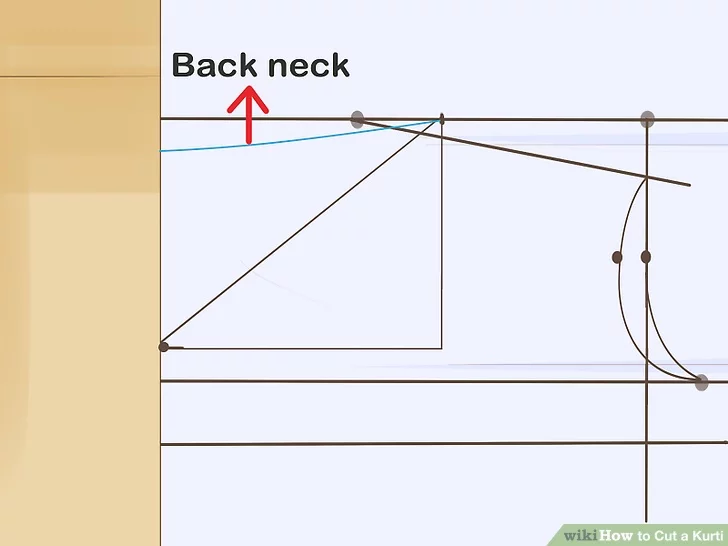
- The back neck hole should always curve, even if the front neck hole is a V or rectangle.
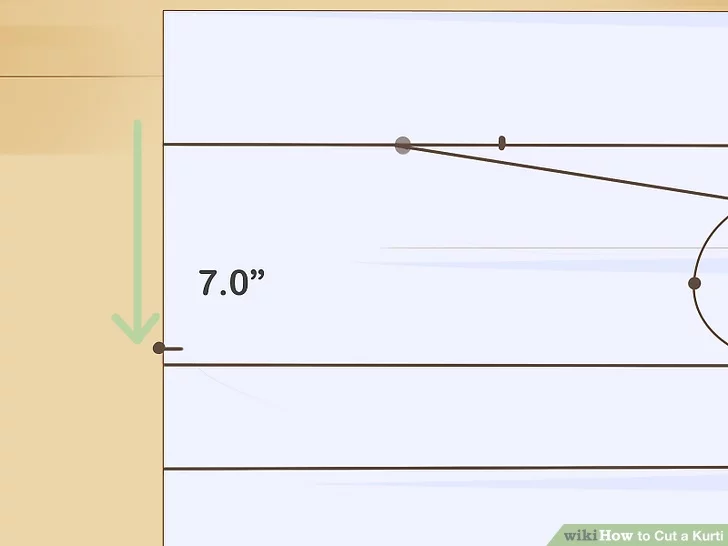
- Like with the arm holes, you will trace and cut this part first, then go back and do the front neck hole.