How to Cut a Kurti part 1, Taking Your Measurements
Kurtis are a simple dress often worn by Indian women. Once you have taken your measurements and drafted your pattern, they are simple to cut. The pattern drafting process takes the longest, but the results are rewarding: a custom-fitted kurti! Once you have cut your kurti, all you have to do is sew it together.
Part 1 – Taking Your Measurements

- Shoulder measurement
- Vertical measurements: bust, waist, full length, hip length
- Round measurements: chest, bust, waist, hip
- Neck measurements: front depth, back depth
- Sleeve measurements: arm round, arm hole, sleeve length, sleeve opening
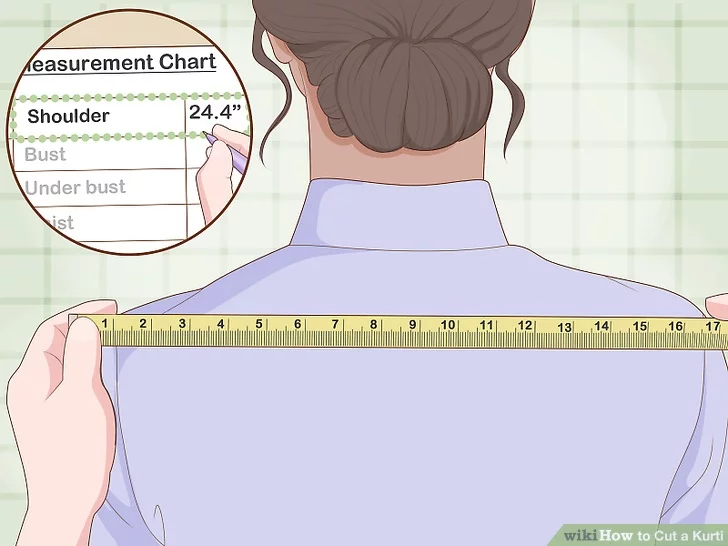
2. Measure your shoulders across your back, from tip-to-tip. Place the end of your measuring tape against your left shoulder, right at the tip where the bone is. Pull the tape across the back of your shoulders, and stop at your right shoulder. Record the measurement in the “Shoulder measurement” section of your chart.[2]
- It might be easier to have someone do this for you. Alternatively, you can get a dress form or make a duct tape mannequin.
- If you are using a dress form, adjust the bust, waist, and hip dials to match your measurements.
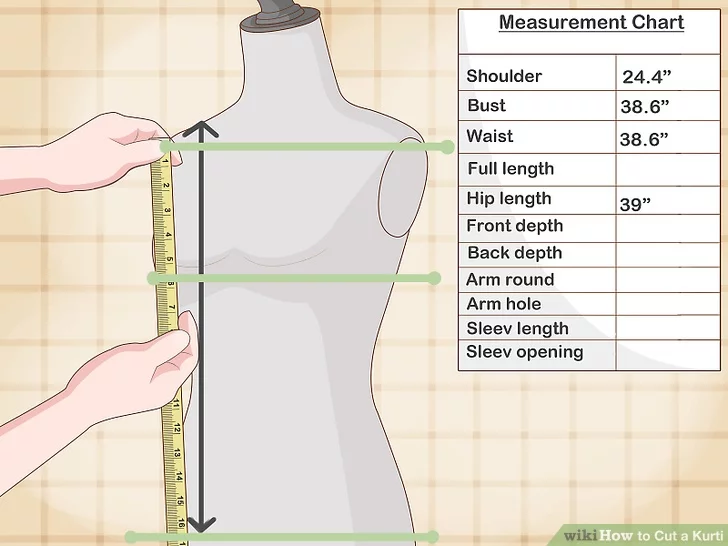
3. Take your vertical measurements starting from the top of your shoulder. Place the end of your measuring tape at the top of your shoulder. Pull the measuring tape down towards the highest point of your bust and write that measurement down in the “bust” subsection. Next:[3]
- Continue pulling the tape down to the narrowest point of your waist. Write the measurement down next to “waist.”
- Pull the tape down to where you want the kurti to end, and record the measurement under “full length.” If you’re doing this on a dress form, you may have to hold the tape against the waist as you kneel.
- For the hip, place the tape at your shoulder and measure straight down to your hip’s fullest point.
- This completes the “Vertical measurements” category.
- Always put a finger between your measuring tape and your body—this prevents your measurements from being too snug.
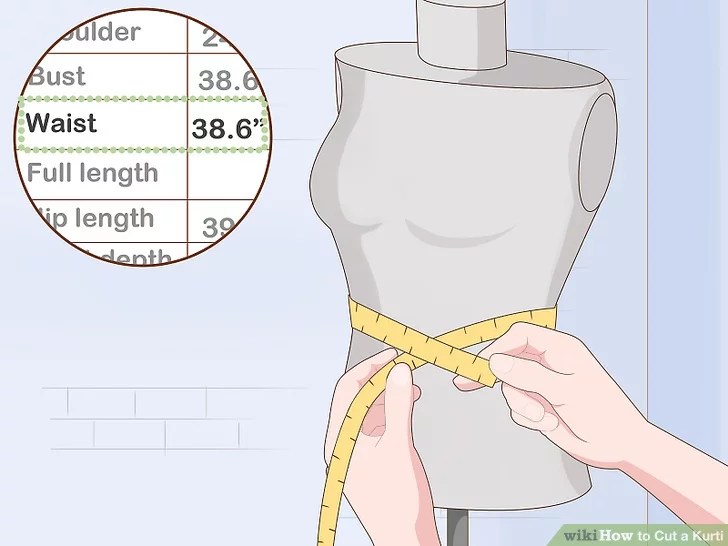
4. Wrap the tape around your chest, bust, waist, and hips. Place the tape behind your back, right under your armpits, and wrap it around your chest (not bust). Record the measurement under the “chest” section of your “Round measurements” category. Next, measure around the fullest part of your bust, the narrowest point of your waist, and the widest part of your hips.[4]
- Write the chest, bust, waist, and hip measurements in each of their designated sections.
- Don’t pull the tape tight or suck in your stomach. Keep both relaxed.

- Repeat the process for the back of your neck. This measurement should be rather small, about 1 to 2 in (2.5 to 5.1 cm).
- Don’t worry about the shape of the collar (e.g., round, V, or square). Just focus on the length.
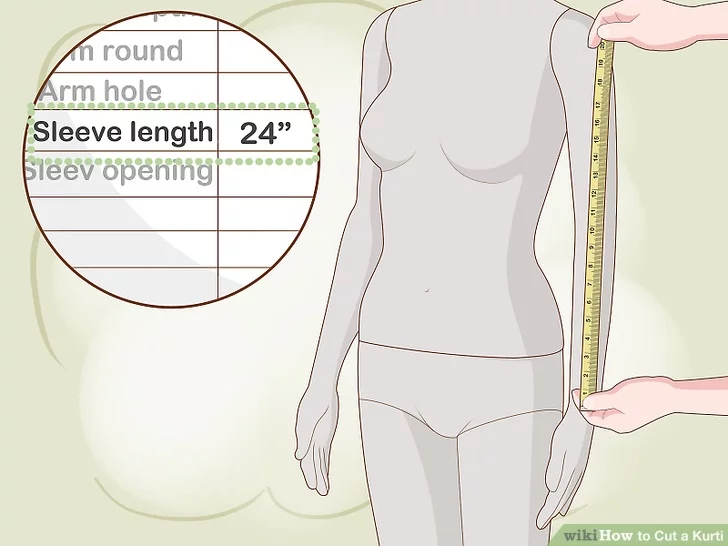
- Sleeve length: measure from the tip of your shoulder down to where you want the sleeve to end (e.g., halfway down your arm).
- Sleeve opening: wrap the tape around the spot where you want the sleeve to end (e.g., halfway down your arm) and record that measurement as well.